
Edge detection is one of the most important concepts in computer vision. It’s a pretty straight forward idea, running edge detection on an image should output only edges, similar to a sketch. My goal is to explain, not only how edge detection works very clearly, but also to provide a new and easy way to improve edge detection significantly with minimal work!
By obtaining only the edges many computer algorithms become possible, as edges contain the majority (or at least a lot) of information in a scene.
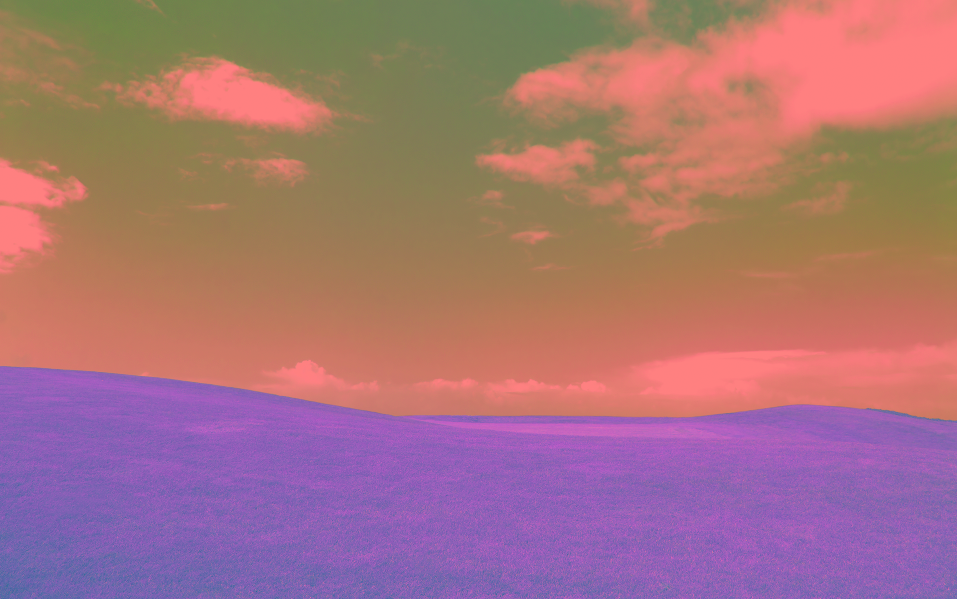
For example, we all remember the Windows XP background with the green hill and blue sky,

When our brains try to make sense of the scene we know there is grass, and it’s pretty uniform. Then we see the sky, with some clouds. Each one of those objects are separate and have an edge between them. That’s where the majority of information is in the scene.
That is why it is such an important concept to computer vision. By reducing an image to edges, it becomes much easier for many algorithms to identify, learn, or process a scene.
Edge Detection: Filtering
The majority of edge detection methods are based off filtering. In general, filtering is the act of removing. For example, I filter my water, removing parasites. Similarly, when we are trying to find edges, we are trying to remove everything except the edges.
The difficulty here, being the removal everything that isn’t a useful edge, but leaving the appropriate edges. How do we know what is a “useful edge”, for example if I run a Canny edge detector on the Windows XP background.
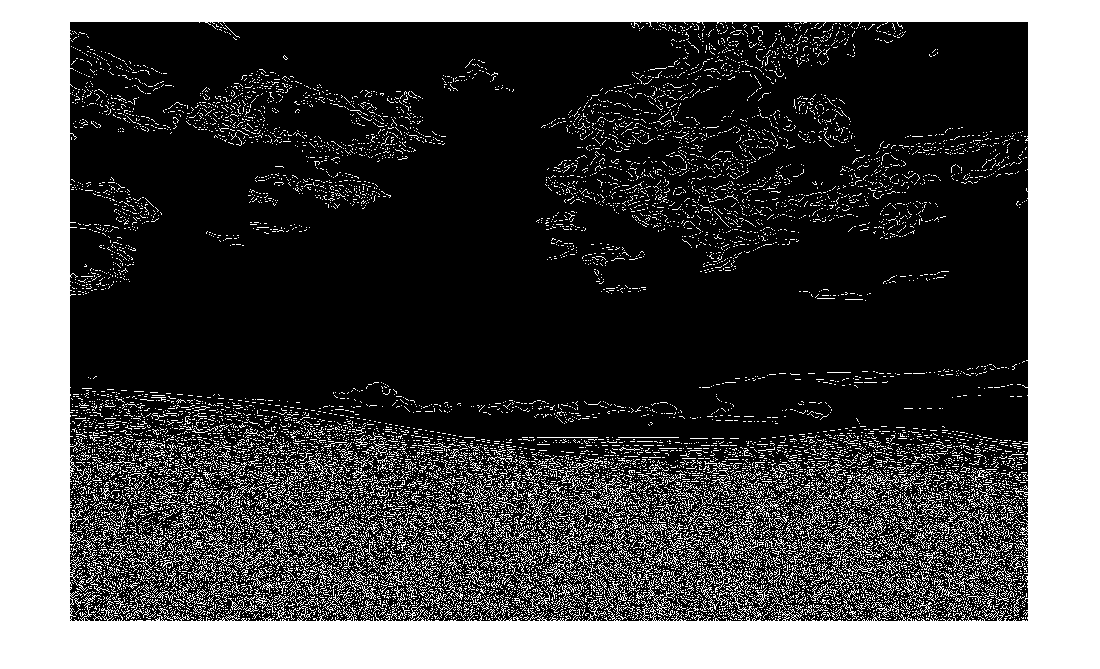 You can see all the little blades of grass, it’s kind of obnoxious and doesn’t really provide useful information. Even the clouds are not really clear. Now, there are perimeters that you can set in most Canny edge detectors, setting a threshold (or non-maxima suppression) for each edge to meet to be labeled “important”. Rather than diving into thresholding in Canny edge, let’s be a bit more general and build a few filters!
Edge Detection: Gaussian Filters
One of the most basic filter in edge detection is the gaussian filter, there are others, but that is what I’ll use throughout this article. A gaussian filter, as the name hints, is a filter based off a gaussian distribution.
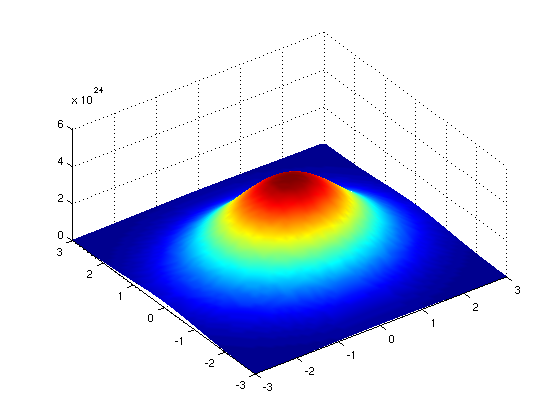 It looks like a parabola (except in 2D!). Gaussian filters can then be applied to each pixel via a matrix multiplication. This accomplishes a blending, making the center pixel be minimally based off its neighbors. If for example I run a evenly distributed gaussian filter (such as the image above) over an image of my cat I get the following:
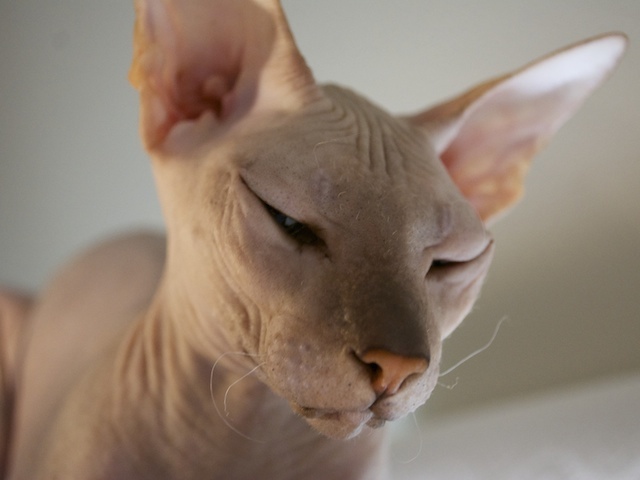

You can see that the image is blurred, the gaussian filter took every pixel, and made a component of the pixel value based off it’s neighbors.
In order to make this useful in edge detection, we can take the derivative of the gaussian in terms of x and y [1]. This may sound counter intuitive, or way over your head, but if we view images of the dervatives of a gaussian it becomes more clear.
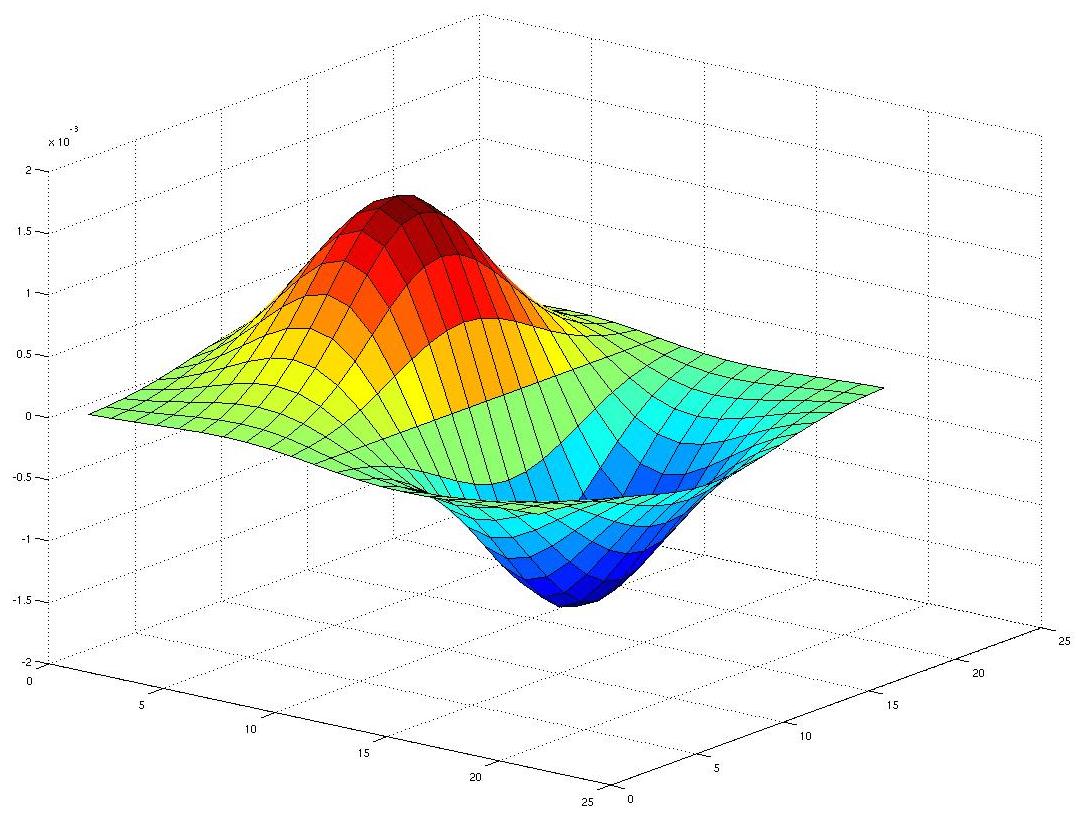 When you take the derivative with respect to the x and y components of a gaussian a large peak and trough is created. If you know derivatives and take a second to consider why this is the case, it should come to you pretty quickly. Due to large changes in the magnitude of the gaussian coming from the peak, a peak and trough occurs.
If we were to code this up, it’s relatively straight forward (at least in Matlab or Python):
That’s it, one lines can get you a gaussian, then take the derivative with respect to x and y.
Edge Detection: Applying Filters
Once we have two gaussians, we apply them on the image. We also use non-maxima suppression, which is the process of setting pixels to zero if they are not part of the local maxima. In other words, remove some of the noise.
The code to apply the filters are as follows:
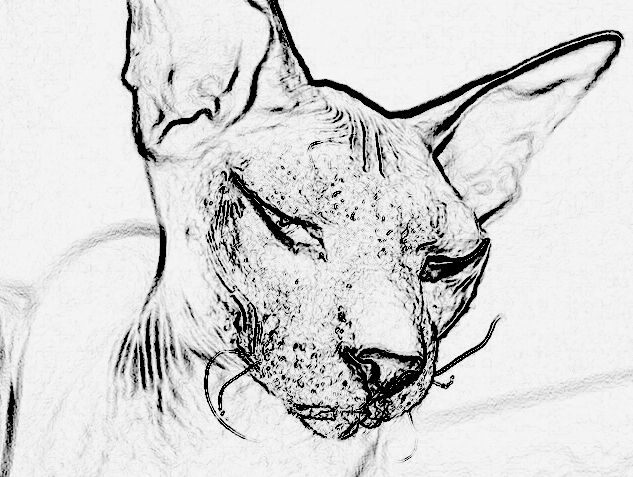
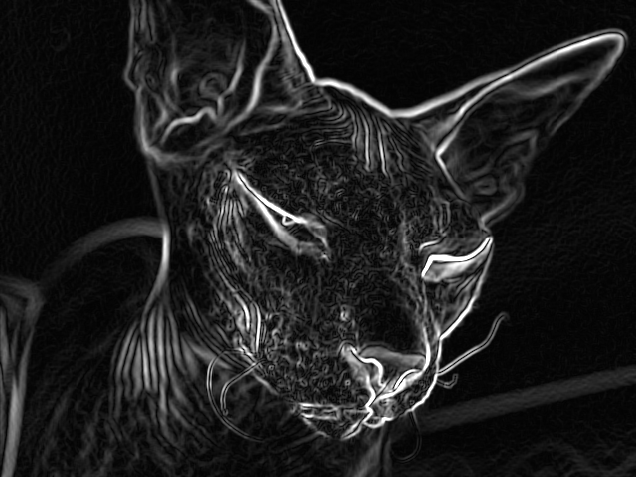
If we then apply that to an image of my cat, we get the following:
What’s interesting, is we can also apply this method to RGB images and get colored edges as well.
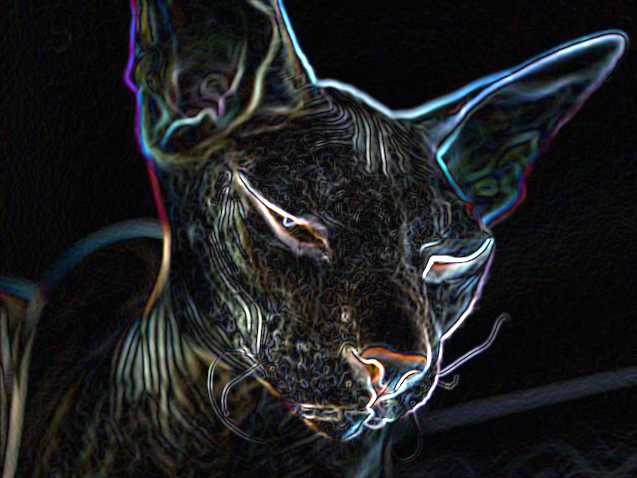
The both images should represent the difference in color between a pixel and it’s neighbor, the color image just has three channels RGB and the black and white image has only one channel.
Edge Detection: Orientated Filters
Why should we limit ourselves to just filters in the absolute x and absolute y direction? Let’s build some oriented filters! This method (more-or-less) comes from a paper by Freeman and Adelson titled The design and use of steerable filters [2], the idea being we can aim our gaussian filter in several direction.
Essentially, we take our gaussian filter and angle it in different directions to create different magnitudes based on the angle of the edge associated with the gaussian. For example, if we angle our gaussian at a 45 degree angle and it on an image with an edge at 45 degree angle it should have a much higher magnitude, than if we used a gaussian at a zero degree with respect to x or y.
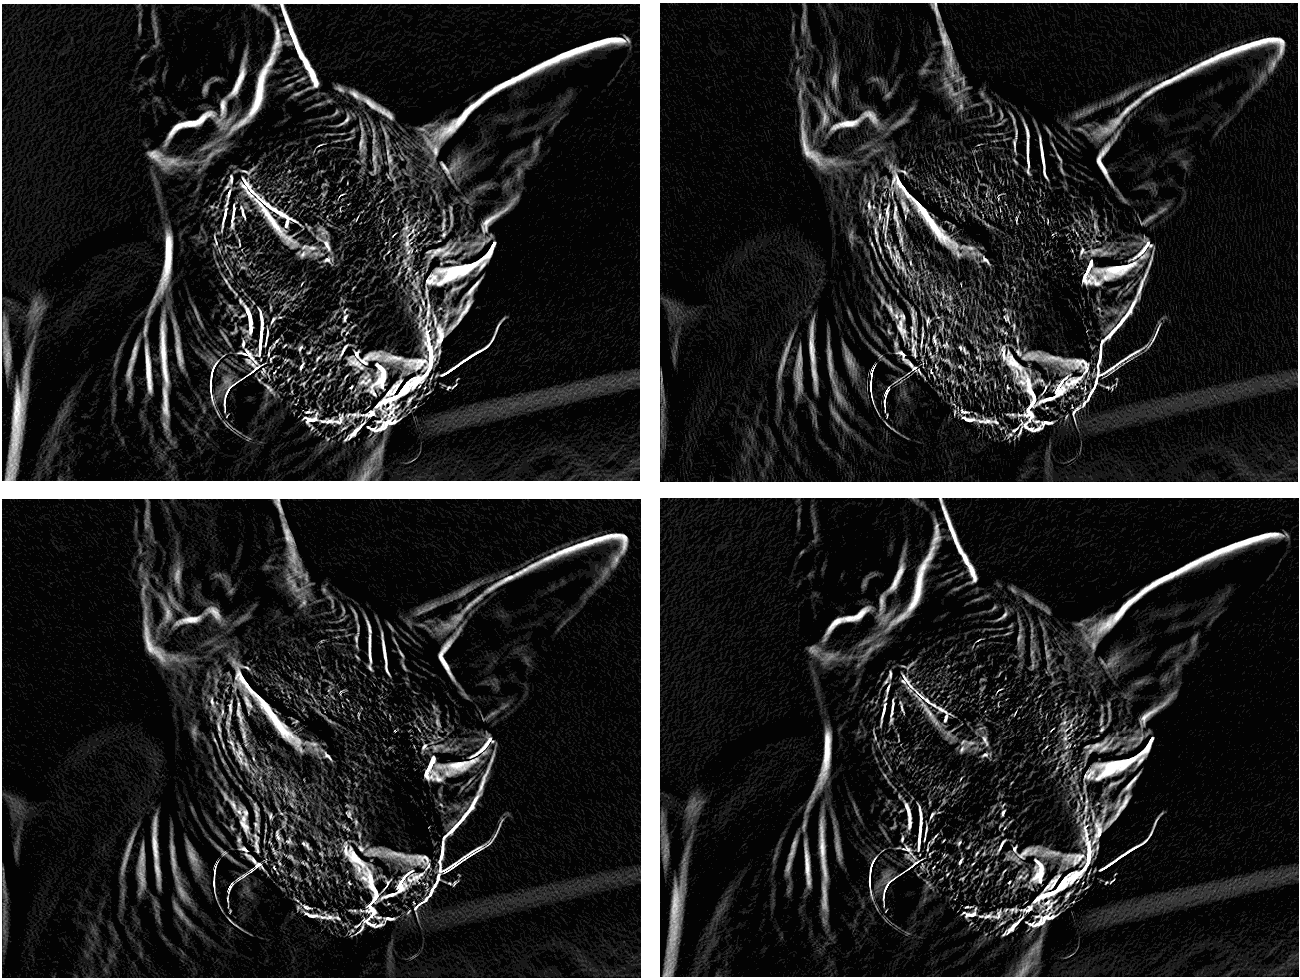
In this case, I generated several different oriented gaussians:

The various gaussians produce filters for 90, 45, -45, and 22.5 degrees, with respect to the x or y components. This produces a variety of different magnitudes of edges, though each filter should detect nearly all of the same edges.
The code I used above was almost the exact same as the single filter, but instead I merged them differently. It looks a bit messy, but I decided to try to make it as clear as possible by making it explicitly clear that I run each filter
If you loo closely you can see the differences in magnitude especially for the wrinkles! Then if we merge, all the images we get a slightly better edge detection of my cat!
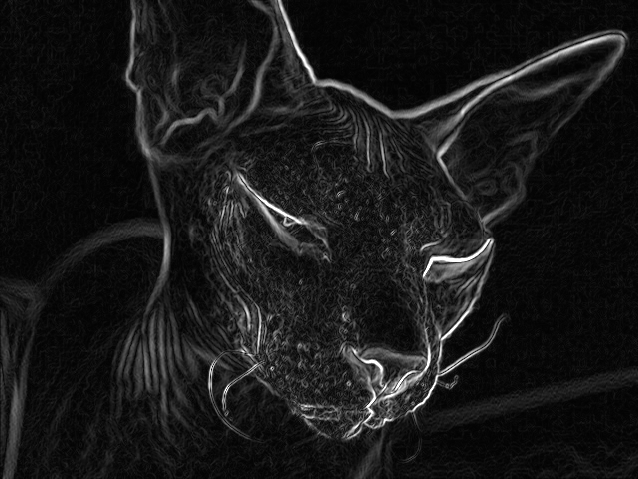
There isn’t that much of a difference between the oriented and non-oriented filters, but it should be possible to see a small improvement with the multiple orientations.
Edge Detection: Improving with Color Spaces
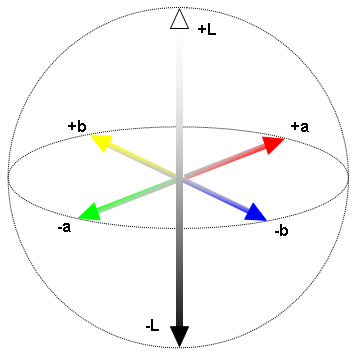
Over the past two years I have done a ton of testing and experimentation in different color spaces. Specifically, the Lab color space, which put simply, is a different way of describing image. For example, we know RGB and gray images, perhaps you even know of the YUV space. The Lab color space is very similar.
The reason I am fascinated with the Lab color is it’s excellent ability to generate edges in a scene.
For the Lab color space each letter represents:
- L – Luminance
- a – alpha – Red to Green
- b – beta – yellow to blue
 In fact, these color channels are perfect for finding gradients, as yellow seems to rarely appear next to yellow naturally, and similarly for red and green (although I have yet to prove this outright). The Lab color space has a strong correlation with how we, as humans, perceive luminance in color. In the Lab color space, luminance is its own separate channel, making it better to handle differences in color as opposed to RGB, where luminance is connected to color.
To put this into action takes minimal extra coding, all we need to do is convert the input image into the Lab color space. There are optimizations you can make, but just doing that one extra step can significantly improve appropriate edge detection.
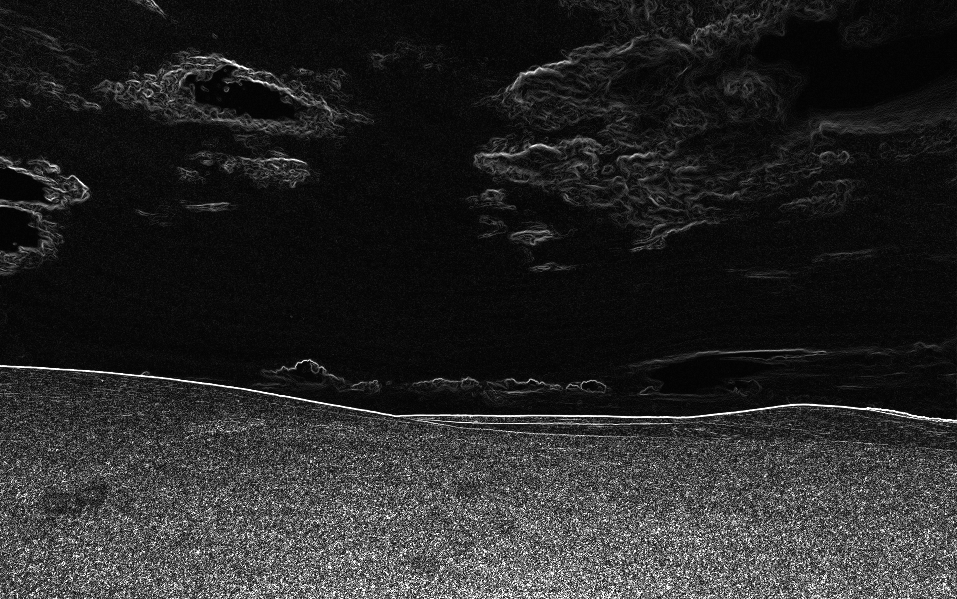
If we convert the old old Windows XP hills image to Lab we get the following.
Then if we apply the filters (without non-maxima suppression) we get the following, a clear visual of what is grass, clouds, and the dividing line between grass and sky.
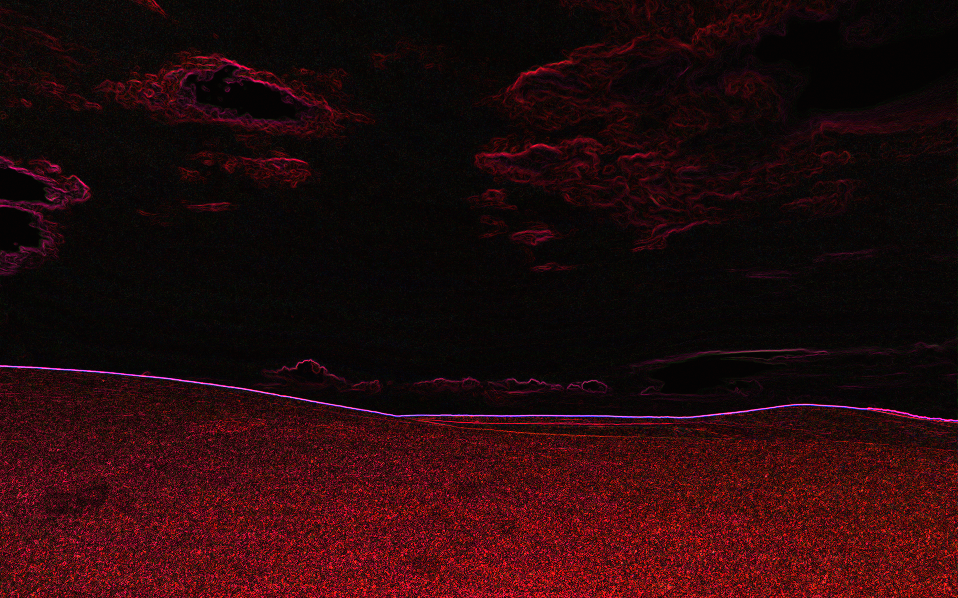
Finally, if we run non-maxima suppression we get a much better representation of the edges than the Canny edge detector at the beginning of the article.
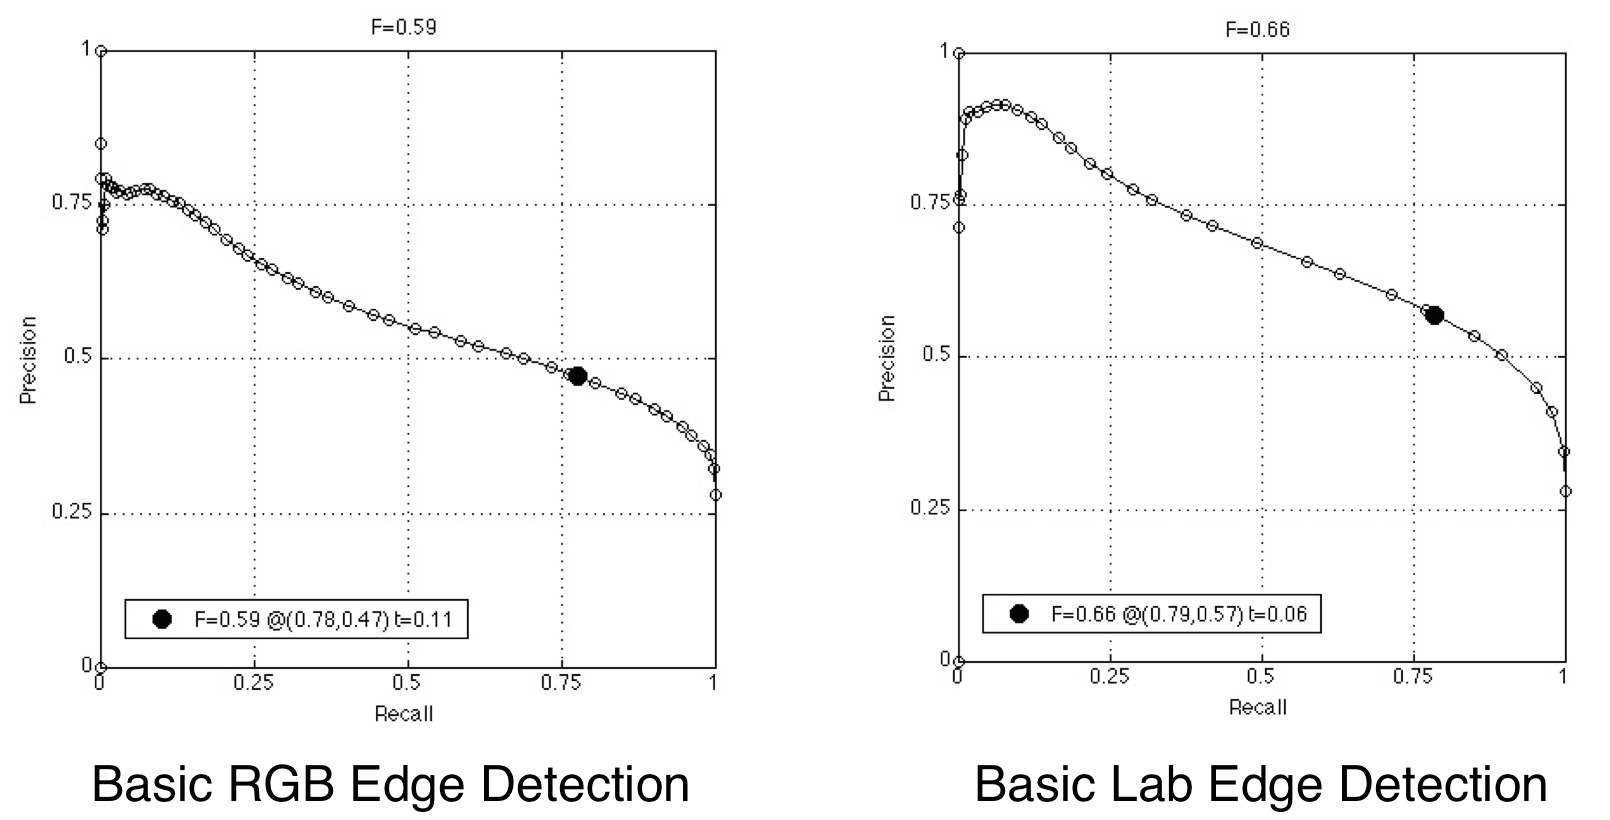
On average, this method will improve the precision of edge detection of a basic method by about 10%. This was determined by running F-measure tests against The Berkeley Segmentation Dataset and Benchmark.
Edge Detection: Closing Remarks
There are infinitely many ways to do edge detection, and the methods described here are by no means the best, easiest to implement, or even easiest to explain.
I explained it using these methods because I personally found them interesting… Plus part of it was assigned as homework for the CS543 course at UIUC, Computer Vision, so if you’re in that course DO NOT COPY MY CODE!
I have made all of my implementation (with a few components redacted for the course) available on my Github, including an OpenCV implementation in C++.
However, if you want to take images of my cat that’s alright.
Recommended Articles
- PCA: Principal Component Analysis
- Everyday Algorithms: Pancake Sort
- Using Computer Vision to Improve EEG Signals
- Introduction to Markov Processes
- The Cache and Multithreading
References
[1] Canny, John. “A computational approach to edge detection.” Pattern Analysis and Machine Intelligence, IEEE Transactions on 6 (1986): 679-698.
[2] Freeman, William T., and Edward H. Adelson. “The design and use of steerable filters.” IEEE Transactions on Pattern analysis and machine intelligence 13.9 (1991): 891-906.
Thanks for sharing~(your cat is really cute LOL~)
that’s a cat? Mommy I don’t want to sleep tonight! 😉
yes, a cute cat.